Discover how to effectively use your Viking oven’s self-clean feature. This guide provides step-by-step instructions for safe and efficient cleaning, ensuring optimal performance and longevity of your appliance.
Preparing the Oven for Self-Cleaning
Ensure your Viking oven is ready for the self-clean cycle by following essential preparation steps. Remove racks, utensils, and wipe up spills to avoid smoke and damage.
- Take out oven racks and utensils to prevent damage.
- Wipe excessive food spillovers to minimize smoke during cleaning.
- Protect the exterior from heat damage with proper covering.
Removing Oven Racks and Utensils
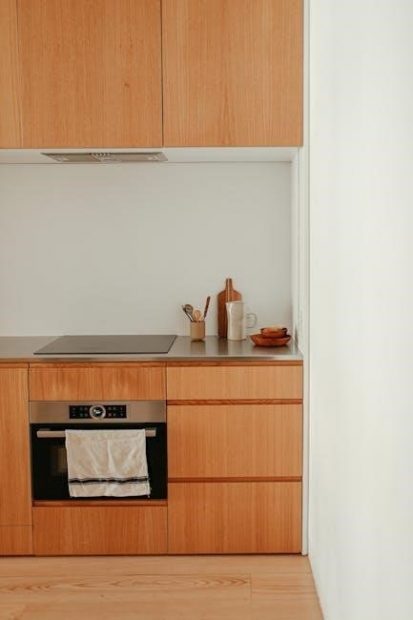
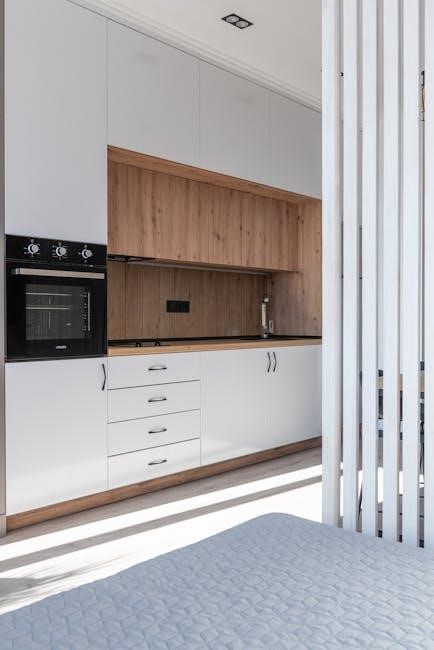
Before initiating the self-clean cycle, it is crucial to remove all oven racks, broiler pans, and utensils. This prevents damage from extreme heat and ensures a thorough cleaning.
- Take out oven racks and rack supports to avoid warping or discoloration.
- Remove broiler pans, grids, and any other accessories that could obstruct the cleaning process.
- Wash these items separately with soap and water to maintain their condition.
This step ensures the self-clean function works efficiently and safely. Always refer to your Viking oven’s manual for specific guidance.
Cleaning Up Excessive Spillovers
Excessive food residue can cause smoke or flare-ups during the self-clean cycle. To prevent this, thoroughly clean up large spills before starting.
- Wipe down the oven floor, walls, and door with a damp cloth to remove loose debris.
- Scrape off heavy buildup using a soft brush or plastic scraper to avoid scratching surfaces.
- Avoid using harsh chemicals or abrasive cleaners, as they may damage the oven’s finish.
By addressing spillovers beforehand, you ensure a safer and more effective cleaning process. This step is essential for maintaining your Viking oven’s performance and longevity.
Protecting the Exterior from Heat Damage
During the self-clean cycle, the oven reaches extremely high temperatures, which can potentially damage the exterior finish. To protect your Viking oven, ensure all exterior surfaces are clear of debris or spills before starting the cycle. Avoid using abrasive cleaners or scouring pads, as they may scratch the finish. For added protection, consider covering nearby surfaces with heat-resistant materials. Regularly wiping down the exterior with a soft cloth and mild soap will also maintain its appearance. Protecting the exterior ensures your Viking oven remains in pristine condition and continues to perform optimally.
Initiating the Self-Clean Cycle
Close the oven door completely, turn the function selector knob to the self-clean mode, and set the temperature control knob to the recommended clean setting. Always consult your oven’s manual for precise instructions to ensure safety and effectiveness during the self-cleaning process.
Setting the Oven Function Selector Knob
To initiate the self-cleaning process, ensure the oven door is completely closed. Locate the oven function selector knob on the control panel. Turn this knob clockwise until it aligns with the “Self Clean” or “Clean” setting. This action engages the self-cleaning mode, preparing the oven to begin the high-temperature cleaning cycle. Always refer to your Viking oven’s user manual for specific instructions, as settings may vary slightly between models. Proper alignment ensures the cycle starts correctly and safely. After setting the knob, proceed to adjust the temperature control knob to the recommended cleaning temperature to complete the process.
Adjusting the Temperature Control Knob
After selecting the “Self Clean” mode, locate the temperature control knob. Turn it clockwise past the clean setting to the recommended temperature, typically around 850°F. This high heat will effectively burn food residue. Ensure the knob is securely positioned to avoid accidental movement. The oven will lock automatically once the cycle begins. Note that the exact temperature may vary depending on your Viking oven model, so consult your manual for specific guidance. Proper adjustment ensures the self-cleaning process operates efficiently and safely, leaving your oven interior clean and free of grime.
Understanding the Self-Clean Cycle Duration
The self-clean cycle on a Viking oven typically lasts between 2 to 4 hours, depending on the soil level and model. Once initiated, the oven locks and begins heating to a high temperature to incinerate food residue. It is essential to let the cycle complete without interruption for optimal results. After the cycle ends, allow the oven to cool before wiping down the interior. Note that some models may have variable cycle times, so refer to your specific manual for details. Proper completion ensures a thorough cleaning and prevents damage to the oven’s components.
Safety Precautions During the Self-Clean Process
Avoid using oven cleaners during the self-clean cycle. Ensure proper ventilation to prevent fumes buildup. Never touch hot surfaces, and stay present to monitor the process for safety.
Avoiding the Use of Oven Cleaners
Never use oven cleaners during the self-clean cycle, as they can damage the oven’s interior or release harmful fumes. The high heat generated during self-cleaning effectively burns away food residue, making manual cleaning with chemicals unnecessary. Using cleaners can also leave harmful residues that might affect future cooking. Instead, rely solely on the self-cleaning feature to maintain your Viking oven. For tougher residue, a small amount of water in the broiler pan can create steam to loosen grime. Always prioritize safety and avoid introducing external cleaning products to ensure optimal performance and longevity of your appliance.
Ensuring Proper Ventilation
Proper ventilation is essential during the self-clean cycle to remove fumes and odors. Open windows and doors to allow fresh air to circulate. Turn on your kitchen exhaust fan to help ventilate the area. This prevents the buildup of strong smoke or unpleasant smells. Keep the room well-ventilated throughout the cleaning process to ensure a safe environment. Avoid inhaling fumes directly, as they may cause discomfort. Regular airflow helps maintain air quality and prevents potential health risks. Always prioritize ventilation to make the self-cleaning process safer and more efficient for your Viking oven.
Staying with the Oven During the Cycle
It is crucial to stay present and monitor the oven throughout the self-clean cycle. This ensures safety and allows you to address any unexpected issues promptly. The high heat generated during cleaning can sometimes produce strong odors or smoke, so being nearby helps manage these situations. Additionally, the cycle duration can vary, and your presence ensures you can respond if needed. Keep an eye on the oven’s progress and be prepared to take action if necessary. This attentive approach helps prevent potential hazards and ensures the cleaning process completes effectively.
Post-Cleaning Care and Maintenance
After the self-clean cycle, allow the oven to cool completely before wiping down the interior with a damp cloth. Replace racks and utensils carefully to maintain functionality.
Allowing the Oven to Cool Down
After the self-clean cycle, it’s crucial to let the oven cool completely before proceeding. This step ensures safety and prevents damage to the appliance. Turn off the oven and allow it to cool naturally; avoid opening the door during this time. The cooling process may take several hours, depending on the oven’s temperature during cleaning. Never touch the oven’s exterior or interior until it has cooled down, as surfaces can remain extremely hot. Keep children and pets away to avoid accidents. Once the oven has cooled, you can safely inspect and clean it further. Proper cooling ensures the oven remains in good working condition for future use.
Wiping Down the Oven Interior
Once the oven has cooled, use a soft, damp cloth to wipe down the interior surfaces. This step removes any remaining ash or residue left after the self-clean cycle. For tougher spots, a soft sponge or cloth lightly dampened with water may be necessary. Avoid using abrasive cleaners, bleach, or harsh chemicals, as they can damage the oven’s finish. Use a microfiber cloth to polish stainless steel surfaces for a streak-free shine. Ensure the oven is completely dry to prevent rust or water spots. This final cleaning step ensures your Viking oven remains in pristine condition and ready for its next use.
Replacing Oven Racks and Utensils
After the self-clean cycle and once the oven has cooled, carefully replace the oven racks and utensils. Ensure they are clean and free from food residue before reinstalling. Position the racks in their original slots, aligning them properly to maintain even cooking performance. If the racks were cleaned separately, dry them thoroughly before placing them back. This step ensures your Viking oven is ready for its next use. Always refer to your oven’s user manual for specific guidance on rack placement and utensil storage to maintain optimal functionality and safety.
Troubleshooting Common Issues
Address issues like unpleasant odors or residue after cleaning by ensuring proper ventilation and using water in the broiler pan for steam cleaning. Always follow manufacturer guidelines.
Addressing Unpleasant Odors After Cleaning
Unpleasant odors after self-cleaning can occur due to residual food particles or high-heat combustion. To address this, ensure proper ventilation by opening windows or turning on exhaust fans. Wipe down the oven interior with a damp cloth after the cycle completes. For lingering smells, place a heat-resistant bowl of water mixed with white vinegar or lemon juice inside the oven and bake at 350°F for 30 minutes. Avoid using harsh cleaners, as they can leave harmful residues. Regularly cleaning up spillovers and maintaining the broiler pan with water can also prevent strong odors during future cycles. Always follow manufacturer guidelines for optimal results.
Dealing with Residue Left After Self-Cleaning
After the self-clean cycle, some residue may remain. Allow the oven to cool completely before addressing it. Use a damp cloth to wipe down the interior, focusing on areas with stubborn residue. For tougher spots, apply a small amount of mild dish soap or a gentle cleanser, but avoid harsh chemicals or abrasive scrubbers, as they can damage the finish. If residue persists, repeat the self-clean cycle or consult your Viking oven’s user manual for recommended solutions. Always avoid using metal scrapers or rough sponges, as they may scratch the oven surfaces. Regular maintenance and prompt cleaning of spills can help minimize residue after future cycles.
Additional Tips for Optimal Performance
For optimal results, use water in the broiler pan during self-cleaning to create steam, helping loosen tough residue. Always follow the manufacturer’s guidelines for best outcomes.
Using Water in the Broiler Pan for Steam Cleaning
Pour 2 cups of distilled or filtered water into the broiler pan before starting the self-clean cycle. This creates steam, helping to loosen tough food residue. Place the pan on the standard rack to maximize steam distribution. The water evaporates during high heat, aiding in breaking down grime. Ensure the pan is large enough to hold the water without spilling. This method enhances cleaning efficiency without using harsh chemicals. Always follow the manufacturer’s guidelines for optimal results and safety. This steam cleaning tip is a recommended practice for maintaining your Viking oven’s interior cleanliness effectively.
Following Manufacturer Guidelines
Always adhere to the instructions provided in your Viking oven’s user manual for self-cleaning. Consult the manual to understand specific settings and safety precautions. Ignoring guidelines can lead to risks like electric shock or fire. Ensure racks and utensils are removed, and avoid using oven cleaners. Properly set the function selector knob to the self-clean mode and adjust the temperature control knob as directed. Follow recommended durations for the self-clean cycle. Manufacturer guidelines are designed to ensure safety and effectiveness. By following them, you maintain your oven’s performance and longevity. This approach guarantees a safe and efficient cleaning process every time.