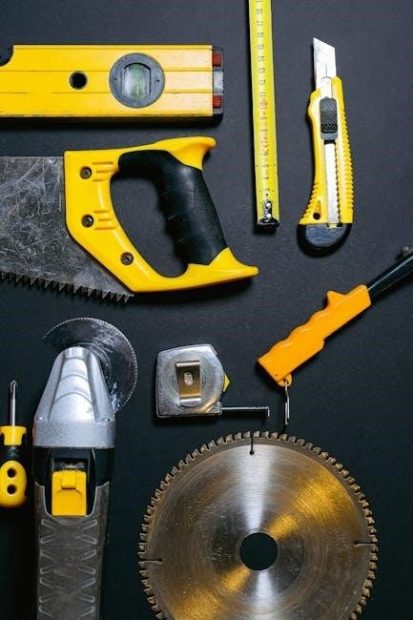
A guide rail for a circular saw is a simple yet essential tool that enhances cutting accuracy and ease‚ allowing for straight‚ precise cuts in various materials. It transforms your saw into a versatile cutting system‚ perfect for DIY projects and professional tasks‚ ensuring cost-effective and high-quality results every time.
1.1 What is a Guide Rail?
A guide rail is a straightedge system designed to help circular saws make precise‚ straight cuts. It acts as a track‚ guiding the saw along the desired cutting path. This tool enhances accuracy and control‚ especially for rip cuts or long‚ straight edges. Guide rails can be homemade or purchased‚ offering versatility for various woodworking tasks. They are simple to use and provide a cost-effective solution for achieving professional-quality results. By attaching the rail to the workpiece‚ users ensure consistent and accurate cuts‚ making it an essential accessory for both DIY enthusiasts and professionals.
1.2 Importance of Using a Guide Rail
Using a guide rail significantly improves the accuracy and consistency of cuts made with a circular saw. It minimizes the risk of human error‚ ensuring straight and precise edges. This tool is especially valuable for rip cuts and long boards‚ where maintaining a steady hand is challenging. A guide rail also enhances safety by keeping the saw on track‚ reducing the likelihood of kickback. Additionally‚ it saves time and material by preventing wasted cuts‚ making it an indispensable accessory for both professionals and DIY enthusiasts aiming for professional-quality results.
1.3 Brief History and Evolution of Guide Rails
The concept of guide rails for circular saws dates back to early woodworking practices‚ where craftsmen used makeshift guides to achieve straight cuts. Over time‚ these rudimentary tools evolved into more sophisticated designs‚ with commercial options emerging to meet growing demand. Modern guide rails now feature advanced materials‚ adjustable systems‚ and anti-kickback mechanisms‚ offering unparalleled precision and safety. This evolution reflects the woodworking community’s continuous pursuit of efficiency and accuracy‚ transforming the guide rail into an essential tool for both professionals and DIY enthusiasts.

Types of Guide Rails for Circular Saws
Guide rails for circular saws come in various forms‚ including homemade‚ commercial‚ adjustable‚ and fixed designs‚ each catering to specific cutting needs and preferences for precision and versatility.
2.1 Homemade vs. Commercial Guide Rails
Homemade guide rails offer a cost-effective‚ customizable solution‚ often made from materials like plywood or aluminum‚ ideal for DIY enthusiasts. Commercial guide rails‚ such as those from Festool‚ provide durability and precision‚ designed for professional use. Homemade options are great for saving money and tailoring to specific needs‚ while commercial ones deliver superior accuracy and longevity. Both options enhance cutting performance‚ but the choice depends on budget‚ project complexity‚ and desired quality. Homemade rails are perfect for occasional use‚ whereas commercial rails are investments for frequent‚ high-precision tasks.
2.2 Adjustable vs. Fixed Guide Rails
Adjustable guide rails offer versatility‚ allowing users to modify the width and angle of cuts‚ making them ideal for complex projects. Fixed guide rails‚ while less flexible‚ provide unmatched stability and durability‚ ensuring consistent results. Adjustable rails are perfect for tasks requiring precision adjustments‚ while fixed rails excel in straightforward‚ repetitive cuts. Both options cater to different needs‚ with adjustable rails suiting dynamic projects and fixed rails offering reliability for standard cutting tasks. The choice depends on the user’s specific requirements and the nature of their work.
2.3 Guide Rails for Specific Cutting Tasks
Guide rails can be tailored for specific cutting tasks‚ such as curved cuts‚ rip cuts‚ or angled cuts. For curved cuts‚ flexible guide rails or adjustable systems are ideal‚ allowing smooth‚ precise curves. Rip cuts benefit from sturdy‚ fixed guide rails that ensure straight‚ consistent results. Angled cuts may require adjustable or tilting guide rails to maintain accuracy. Specialized guide rails enhance versatility‚ enabling users to tackle a variety of projects with ease and precision‚ making them indispensable for both standard and complex cutting tasks in woodworking and construction projects.
Choosing the Right Guide Rail for Your Needs
Selecting the ideal guide rail involves considering material‚ length‚ and adjustability. Ensure it aligns with your saw and project requirements for precise‚ professional results while saving time and money.
3.1 Factors to Consider When Selecting a Guide Rail
When choosing a guide rail‚ consider material durability‚ length‚ and adjustability. Ensure it suits your saw type and project needs. Opt for rails with anti-kickback features and smooth gliding. Measure your workpiece to determine the required length and width. Adjustable rails offer flexibility for various cuts‚ while fixed rails provide stability. Consider the material’s resistance to wear and tear. Align the rail with your saw’s base for accuracy. Budget and storage space are also key factors. A well-chosen guide rail enhances precision and safety‚ making it a worthwhile investment for woodworking tasks.
3.2 Material Options for Guide Rails
Guide rails can be made from various materials‚ each offering unique benefits. Aluminum is lightweight yet durable‚ ideal for homemade setups. Steel provides maximum stability and longevity‚ often used in commercial models. Durable plastics are another option‚ combining strength with cost-effectiveness. For DIY projects‚ plywood or similar materials can be used‚ offering an affordable and easy-to-customize solution. The choice of material depends on your specific needs‚ ensuring optimal performance and durability for precise cuts.
3.3 Length and Width Considerations
Choosing the right length and width for your guide rail is crucial for optimal performance. The length should match the size of your workpiece or project‚ ensuring straight cuts without repositioning. A longer rail provides stability for large materials‚ while a shorter one is ideal for smaller tasks. The width should be wide enough to prevent wobbling but narrow enough to avoid obstructing the saw’s movement. Properly securing the rail to the workpiece ensures accuracy and ease of use‚ making it essential for achieving professional-quality results in woodworking projects.
Step-by-Step Guide to Making a Homemade Guide Rail
Create a cost-effective guide rail using basic materials like plywood and springs. Follow a simple tutorial to build a sturdy system for straight‚ precise cuts‚ saving money and enhancing your woodworking projects with professional-quality results.
4.1 Tools and Materials Required
To make a homemade guide rail‚ you’ll need a few basic tools and materials. Start with a tape measure‚ plywood or aluminum for the rail‚ and screws. Add a spring for tension and a loop for attachment. Sandpaper and a drill will help smooth and secure the parts. Optional items include clamps for stability and a marker for precise alignment. These materials are readily available at most hardware stores‚ ensuring your project is both affordable and accessible. Gather everything beforehand to streamline the assembly process and achieve professional results.
4.2 Measuring and Marking the Guide Rail
Accurate measuring and marking are crucial for a functional guide rail. Use a tape measure to determine the desired length and width‚ ensuring it aligns with your saw blade. Mark the measurements on the material‚ double-checking for precision. Align the rail with the saw’s baseplate notch to ensure straight cuts. Use a marker to clearly define the cutting line‚ and consider clamping the rail in place to maintain stability during marking. This step ensures your guide rail fits perfectly and delivers precise results for your woodworking projects.
4.3 Assembly and Installation
Assemble the guide rail by attaching the measured and marked components using screws or bolts‚ ensuring a sturdy structure. Align the rail with the circular saw’s baseplate notch for proper fitment. Secure the rail to the workpiece using clamps or brackets‚ ensuring it remains stable during cuts. Double-check the alignment to prevent misguidance. For added stability‚ attach an extension spring to the underside of the crosspiece‚ allowing the saw to swing freely. Once installed‚ test the setup by making a small cut to ensure accuracy and adjust as needed for optimal performance.
Safety Tips When Using a Guide Rail
Always handle the saw and guide rail with care‚ ensuring proper positioning to avoid kickback. Regularly inspect the rail for damage and keep hands away from the blade. Maintain a firm grip and ensure the workpiece is secure to prevent movement during cuts.
5.1 Proper Handling and Positioning
Proper handling and positioning of the guide rail are crucial for safe and accurate cuts. Always ensure the rail is securely attached to the workpiece and aligned with the saw blade. Maintain a firm grip on the saw‚ keeping hands away from the blade. Position the guide rail straight and level‚ avoiding any obstructions. Double-check the alignment before cutting to prevent kickback or uneven cuts. Ensure the workpiece is stable and secure to maintain control throughout the cutting process.
5.2 Avoiding Kickback and Other Hazards
Kickback occurs when the saw blade binds or catches material‚ causing dangerous backward motion. To prevent this‚ ensure proper alignment of the guide rail and blade. Keep the workpiece secure and flat‚ avoiding loose or uneven surfaces. Use the anti-kickback feature on your saw if available. Maintain sharp blades and avoid overloading the saw. Always keep hands and body parts away from the blade path. Regularly inspect the guide rail for damage or misalignment. Proper handling and positioning‚ as well as maintaining equipment‚ are key to minimizing risks and ensuring safe cutting operations.
5.3 Maintenance and Inspection
Regular maintenance and inspection of your guide rail are crucial for optimal performance and safety. Clean the rail frequently to remove dust‚ debris‚ and sawdust‚ which can cause misalignment. Lubricate moving parts to prevent rust and ensure smooth operation. Inspect the rail for damage‚ such as dents or warping‚ and address issues promptly. Store the guide rail in a dry‚ secure location to avoid accidental damage. Replace worn-out or damaged components to maintain accuracy. Proper upkeep ensures consistent results and extends the lifespan of your guide rail‚ keeping your cuts precise and reliable over time.
Using the Guide Rail with Your Circular Saw
A guide rail ensures straight‚ precise cuts by aligning the saw blade with the workpiece. It simplifies cutting long‚ straight lines and enhances overall cutting accuracy effortlessly.
6.1 Aligning the Guide Rail with the Saw Blade
Aligning the guide rail with the saw blade is crucial for precise cuts. Start by marking the cut line on the workpiece. Measure the distance from the blade edge to the guide rail‚ ensuring it matches the mark. Secure the rail firmly‚ then position the saw to align the blade with the marked line. Double-check the alignment to avoid errors. Proper alignment ensures straight cuts and prevents wobbling‚ making your projects more professional and accurate. Always verify measurements before cutting for optimal results.
6.2 Securing the Guide Rail to the Workpiece

Securing the guide rail to the workpiece ensures stability and accuracy during cuts. Use clamps or screws to firmly attach the rail‚ aligning it with your marked cut line. Double-check that the rail is straight and evenly positioned. For larger projects‚ consider using multiple clamps to prevent movement. Ensure the workpiece is flat and stable before securing the rail. Properly fastened‚ the guide rail will help maintain precise control‚ reducing the risk of errors and improving the quality of your cuts. Always verify alignment before starting the saw.

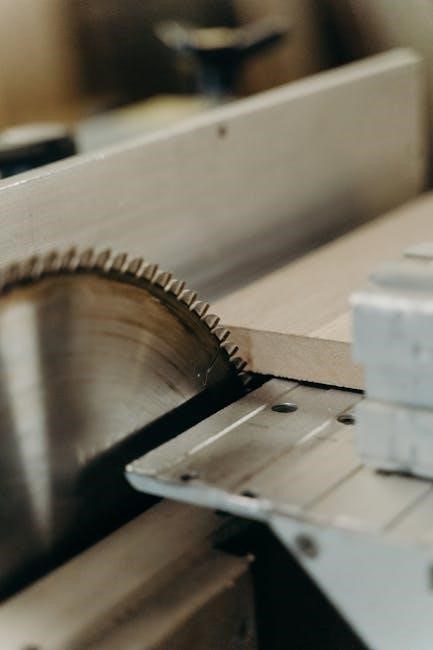
6.3 Making Straight and Precise Cuts
With the guide rail securely in place‚ align the circular saw blade with the edge of the rail. Ensure the saw moves smoothly along the rail without wobbling. Use a steady‚ consistent motion to make the cut‚ keeping the saw flat and level. For optimal results‚ maintain light to moderate pressure‚ avoiding excessive force that could cause misalignment. Use a pencil mark as a visual guide to stay on track. This method ensures straight‚ precise cuts‚ transforming your circular saw into a tool capable of professional-quality results for various woodworking projects.

Advanced Techniques for Using a Guide Rail
Explore advanced techniques for using guide rails‚ such as cutting curves‚ angles‚ and complex patterns. Utilize multiple rails for intricate designs and integrate with other woodworking tools for enhanced precision and versatility.
7.1 Cutting Curves and Angles
Cutting curves and angles with a circular saw and guide rail requires precision and the right technique. By attaching a custom jig or using an adjustable guide rail setup‚ you can achieve smooth‚ curved cuts. Mark the desired curve on the material and align the guide rail to follow the path; For angles‚ position the rail at the desired degree and ensure the saw blade stays aligned. This method allows for versatile and precise cuts‚ transforming your circular saw into a multi-functional tool for complex woodworking projects.
7.2 Using Multiple Guide Rails for Complex Cuts
Using multiple guide rails for complex cuts with a circular saw offers enhanced precision and control. By arranging guide rails at specific angles or in tandem‚ you can achieve intricate cuts‚ such as bevels or compound angles. This setup is particularly useful for projects requiring detailed shapes or multi-directional cuts. Ensure the rails are securely fastened and aligned to maintain accuracy. This technique allows for versatile and precise cutting‚ making it ideal for challenging woodworking tasks that demand high accuracy and creativity.

7.3 Integrating with Other Woodworking Tools
Integrating a guide rail with other woodworking tools enhances functionality and precision. Combine it with jigs‚ fences‚ or miter gauges for complex cuts. This setup allows for seamless transitions between tools‚ improving workflow. Use it alongside a router for edge profiling or with a drill press for accurate hole placement. The guide rail’s versatility makes it a cornerstone in modern woodworking‚ enabling craftsmen to achieve professional results efficiently. This integration expands your tool’s capabilities‚ ensuring precise and consistent outcomes across various projects.
Troubleshooting Common Issues
Identify and address misalignment‚ wobbling‚ or uneven cuts by realigning the guide rail or adjusting its fit. Regular maintenance ensures smooth operation and accurate results.
8.1 Dealing with Misalignment
Misalignment is a common issue that can affect the accuracy of your cuts. To address this‚ start by checking the guide rail’s position relative to the saw blade. Ensure the rail is parallel to the blade and securely fastened to the workpiece. If the saw drifts‚ adjust the rail’s alignment or use clamps to hold it firmly in place. Regularly inspect the rail for damage or wear‚ as this can cause misalignment. Proper alignment ensures straight‚ precise cuts and prevents uneven results. Always double-check your setup before cutting.
8.2 Fixing Wobbling or Uneven Cuts

Wobbling or uneven cuts can often be resolved by ensuring the guide rail is properly aligned and securely attached to the workpiece. Check for any play in the rail and tighten all connections. If the saw still wobbles‚ inspect the guide rail for damage or wear. A warped or bent rail can cause uneven cuts‚ so replace it if necessary. Additionally‚ ensure the workpiece is flat and firmly secured to prevent movement during cutting. Making slow‚ steady passes and maintaining proper saw maintenance can also help achieve smoother‚ more consistent results.
8.3 Adjusting the Guide Rail for Accuracy
Ensuring your guide rail is accurately aligned is crucial for precise cuts. Start by checking the rail for any damage or warping‚ as this can affect alignment. Use a straightedge to verify the rail’s straightness and make adjustments if necessary. Secure the rail firmly to the workpiece using clamps or screws‚ ensuring it doesn’t shift during cutting. Double-check the alignment with the saw blade to maintain consistency. Fine-tune the rail’s position by loosening and re-tightening the clamps slightly‚ ensuring it lies flat and even. Proper adjustment guarantees straight‚ accurate cuts and enhances overall project quality.

Maintenance and Upkeep of the Guide Rail
Regular cleaning prevents dust buildup‚ while lubricating moving parts ensures smooth operation. Store the guide rail in a dry place to avoid rust and maintain accuracy.
9.1 Cleaning and Lubricating the Guide Rail
Regular cleaning and lubrication are crucial for maintaining the guide rail’s performance. Use a soft cloth to wipe away dust and debris‚ ensuring smooth operation. For tougher buildup‚ compressed air can be effective. Apply a silicone-based lubricant to moving parts every 1-2 months to prevent rust and friction. Avoid using heavy oils‚ as they may attract dust. Inspect the rail for damage or wear during cleaning and replace parts as needed. Proper maintenance ensures precise cuts and extends the guide rail’s lifespan.
9.2 Storing the Guide Rail Properly
Proper storage of the guide rail is essential to maintain its accuracy and longevity. After cleaning‚ store it in a dry‚ cool place away from direct sunlight and moisture. Use a protective case or bag to prevent dust and damage. Avoid extreme temperatures or humidity‚ as they can warp or rust the rail. Ensure the storage area is clean and free from debris to keep the guide rail in optimal condition. Proper storage ensures your guide rail remains precise and ready for future projects.
9.3 Replacing Damaged or Worn-Out Parts
Regularly inspect the guide rail for damage or wear. If damaged‚ replace parts promptly to maintain accuracy. Start by disconnecting the guide rail from the saw and removing any fasteners. Replace worn-out components like the edge guide or stops with compatible parts. Ensure all replacements are securely tightened. After installation‚ test the guide rail to confirm proper alignment and smooth operation. Replacing damaged parts prevents further deterioration and ensures consistent cutting performance. Always use high-quality replacement parts to maintain the guide rail’s reliability and precision.

Comparison with Other Cutting Guides
A guide rail offers a cost-effective‚ versatile alternative to laser guides‚ fence systems‚ and track saws‚ providing precise cuts without the need for expensive specialized tools.
10.1 Guide Rail vs. Laser Guide
A guide rail provides a physical attachment for precise cuts‚ while a laser guide projects a light for alignment. Guide rails are more cost-effective and ensure straight cuts‚ making them ideal for DIY projects. Laser guides offer visibility but may lack the accuracy of a physical rail. For woodworking‚ guide rails are preferred for their reliability and ease of use‚ especially for rip cuts and long straight edges. They transform your circular saw into a track saw alternative‚ delivering professional results without the need for expensive tools.
10.2 Guide Rail vs. Fence System
A guide rail and a fence system both aid in achieving precise cuts‚ but they differ in functionality. A guide rail is portable and attaches directly to the workpiece‚ offering versatility for various projects. Fence systems are typically fixed to a workbench or table‚ providing stability for repetitive cuts. Guide rails are ideal for DIY enthusiasts and flexible setups‚ while fence systems suit professional workshops requiring consistent accuracy. Both enhance cutting precision but cater to different user needs and environments‚ making them valuable tools in their own right.
10.3 Guide Rail vs. Track Saw
A guide rail and a track saw both enable precise cuts but differ in design and functionality. A guide rail is a simple‚ cost-effective accessory for circular saws‚ offering flexibility for various cutting tasks. Track saws‚ like the Festool TS 55‚ are specialized tools with built-in guides‚ providing advanced precision and ease of use. While guide rails are ideal for DIY projects and budget-conscious users‚ track saws cater to professionals needing high accuracy and efficiency. Both tools aim to enhance cutting performance but serve different user needs and preferences.
A guide rail for a circular saw empowers users to achieve professional-quality cuts with precision and ease‚ making it an indispensable tool for both DIY projects and advanced woodworking tasks.
11.1 Summary of Key Points
A guide rail for a circular saw is a versatile tool that enhances cutting accuracy and ease‚ enabling straight‚ precise cuts in various materials. It transforms your saw into a cost-effective alternative for professional-quality results. Homemade options offer affordability and customization‚ while commercial rails provide durability and convenience. Proper alignment‚ secure positioning‚ and regular maintenance are crucial for optimal performance. Whether for DIY projects or advanced woodworking‚ a guide rail is an indispensable asset‚ ensuring precise and efficient cutting every time.
11.2 Final Thoughts on Using a Guide Rail
Using a guide rail with your circular saw is a game-changer for achieving precision and ease in woodworking. It offers versatility for both professionals and DIYers‚ enabling straight‚ accurate cuts with minimal effort. Whether homemade or commercial‚ a guide rail enhances your saw’s capabilities‚ making it a cost-effective alternative to specialized tools. By investing time in proper setup and maintenance‚ you can unlock its full potential‚ elevating your projects to professional standards. Embrace this essential tool and explore its limitless possibilities for your woodworking journey.
11.3 Encouragement to Try DIY Projects
Embrace the world of DIY woodworking by creating your own guide rail for a circular saw. This cost-effective solution is perfect for beginners and seasoned craftsmen alike‚ offering a sense of accomplishment and creativity. With a homemade guide rail‚ you can achieve professional-quality cuts without breaking the bank. DIY projects not only save money but also foster problem-solving skills and confidence. Start small‚ experiment‚ and gradually tackle more complex tasks. The satisfaction of building something with your own hands is unparalleled‚ making DIY a rewarding journey for anyone eager to learn and create.