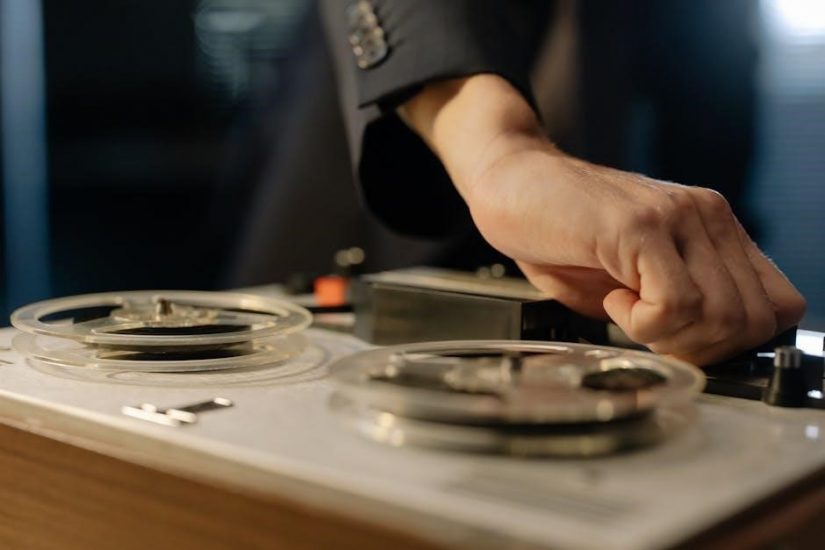
Welcome to the Audio-Technica AT-LP120-USB turntable, a professional-grade direct-drive system designed for vinyl enthusiasts and DJs. This manual guides you through its features, setup, and operation.
1.1 Overview of the AT-LP120-USB Model
The AT-LP120-USB is a professional-grade direct-drive turntable designed for DJs and vinyl enthusiasts. It features a high-torque motor, USB connectivity for digital recording, and a built-in phono preamp. Compatible with Windows and Mac, it offers versatile operation and easy integration with modern audio systems.
1.2 Importance of Reading the User Manual
Reading the user manual is essential for correct usage, optimal performance, and safety. It provides detailed instructions for setup, operation, and troubleshooting, ensuring you understand all features and functions. Follow the manual to avoid damage, resolve issues, and enjoy uninterrupted use of your AT-LP120-USB turntable for years to come.

Key Features and Specifications
The AT-LP120-USB is a professional-grade turntable with a direct-drive motor, USB output, built-in phono preamp, and high-torque design, making it ideal for vinyl enthusiasts and DJs.
2.1 Direct-Drive High-Torque Motor
The AT-LP120-USB features a direct-drive, high-torque motor, ensuring precise and consistent record rotation. This design eliminates belts, reducing motor noise and vibrations, while providing quick start and stop times, making it perfect for both professional use and home listening.
2.2 USB Output for Digital Connectivity
The AT-LP120-USB includes a built-in USB output, enabling direct connection to computers for digitizing vinyl records. Compatible with both Windows and Mac, it simplifies transferring music to digital formats. The USB interface ensures high-quality audio transfer, making it ideal for archiving or editing recordings with ease and precision.
2.3 Built-In Phono Preamp and RCA Outputs
The AT-LP120-USB features a built-in phono preamp, eliminating the need for an external preamplifier. This allows direct connection to speakers, receivers, or amplifiers. The turntable also includes RCA output connectors, ensuring high-quality analog audio transmission. These features enhance versatility, making it compatible with various home audio systems for optimal listening experiences.
2.4 Compatible Cartridge and Adjustable Counterweight
The AT-LP120-USB comes with the AT95E cartridge, offering clear and precise audio reproduction. The adjustable counterweight ensures proper tonearm balance, optimizing tracking force. This feature prevents excessive wear on records and improves sound quality. Proper adjustment is crucial for maintaining optimal performance and longevity of the cartridge and stylus.
System Requirements and Compatibility
The AT-LP120-USB is compatible with Windows and Mac operating systems. It requires a USB connection and compatible software for digital recording, ensuring seamless integration with modern computers.
3.1 Operating Systems Supported (Windows and Mac)
The AT-LP120-USB turntable is compatible with both Windows and Mac operating systems, ensuring versatility for users across different platforms. It connects seamlessly via USB, eliminating the need for additional drivers, and supports digital recording software for easy transfer of vinyl to digital formats.
3.2 Software Requirements for USB Functionality
The AT-LP120-USB turntable requires compatible software for USB functionality, such as Audacity or other digital recording programs. It supports both Windows and Mac operating systems without needing additional drivers, ensuring smooth connectivity for digitizing vinyl records;

Setting Up the Turntable
Unbox and carefully place the turntable on a stable, flat surface. Attach the dust cover and platter, then balance the tonearm and set the counterweight for optimal performance.
4.1 Unboxing and Initial Setup
Begin by carefully unboxing the turntable and verifying all components are included. Place the unit on a stable, flat surface to ensure proper operation. Remove any protective packaging materials and attach the platter and dust cover. Familiarize yourself with the controls and connections before proceeding to further setup steps outlined in this manual.
4.2 Placing the Turntable on a Stable Surface
Place the AT-LP120-USB on a flat, stable, and rigid surface to ensure optimal performance. Avoid uneven or soft surfaces, as they may cause vibrations and affect sound quality. Position the turntable away from loudspeakers to minimize resonance. Ensure the surface is level to maintain proper platter rotation and tonearm alignment for precise playback and recording capabilities.
4.3 Attaching the Dust Cover and Platter
Attach the dust cover by aligning its hinges with the turntable’s mounting pins. Gently lower it into place and ensure it clicks securely. Next, place the platter on the spindle, making sure it is properly seated and the spindle is fully engaged. This ensures smooth rotation and prevents any wobbling during operation.
4.4 Balancing the Tonearm and Setting the Counterweight
First, remove the stylus guard to access the tonearm. Adjust the counterweight by sliding it along the tonearm until it balances evenly without tilting. Use the tracking force guide to set the recommended weight, ensuring proper record tracking and minimizing distortion. This step is crucial for optimal sound quality and stylus longevity.

Operating the AT-LP120-USB
Press the power button to turn on the turntable. Use the start/stop button to control playback. Adjust speed and pitch settings as needed for optimal performance. Ensure proper needle placement and use the strobe light to verify accurate rotation speed for precise sound reproduction.
5.1 Powering On and Basic Controls
Press the power button to turn on the AT-LP120-USB. Use the start/stop button to control playback. Adjust the speed selector (33/45 RPM) and pitch control for precise tuning. The strobe light helps verify accurate rotation speed, ensuring optimal performance and high-quality sound reproduction. These basic controls provide easy operation for both beginners and experienced users.
5.2 Playing Vinyl Records
Place the record on the platter, ensuring it’s secure with the provided mat. Gently cue the stylus over the desired track. Press the start/stop button to begin playback. Adjust the counterweight as needed for optimal tracking force, ensuring clear and distortion-free sound. Always handle records by the edges to prevent damage to the stylus and vinyl.
5.3 Adjusting Pitch and Speed Settings
Use the pitch slider to adjust playback speed, ensuring accurate tempo control. Select 33 or 45 RPM using the speed button. Fine-tune the pitch +/-8% for precise adjustments. Always refer to the user manual for specific guidance on maintaining optimal playback quality and avoiding damage to your records.
5.4 Using the Strobe Light for Speed Accuracy
The AT-LP120-USB features a strobe light to ensure accurate speed control. Activate the strobe to check platter speed with the illuminated dots, verifying 33 or 45 RPM. This tool is essential for DJs requiring precise tempo matching. Consult the user manual for detailed guidance on using the strobe light effectively.

Connecting to Computers via USB
Connect your AT-LP120-USB to a computer using the included USB cable for easy digital recording. The turntable is compatible with both PC and Mac systems, enabling seamless vinyl-to-digital transfers.
6.1 Using the Included USB Cable
Connect the AT-LP120-USB to your computer using the provided USB cable. This allows for direct transfer of vinyl recordings to digital formats. The cable ensures a stable connection, enabling easy recording without additional drivers. Simply plug in the USB cable to your computer’s port and start transferring your vinyl collection to digital files effortlessly.
6.2 Installing Drivers and Software
Install the necessary drivers and software from the Audio-Technica website to enable USB functionality. The turntable is plug-and-play, requiring no additional drivers for basic connection. Download the provided software to transfer vinyl records to digital formats. Follow the on-screen instructions to complete the installation and ensure proper connectivity for recording and playback functions.
6.3 Transferring Vinyl to Digital Format
Connect the turntable to your computer via USB and install the provided software. Open the software, select the AT-LP120-USB as the input device, and choose your preferred digital format. Play the vinyl record and press record in the software to begin capturing the audio. Monitor the recording to ensure optimal quality and accuracy.
Troubleshooting Common Issues
Address common problems like no power, USB disconnections, or distorted sound by checking connections, ensuring proper setup, and referring to the manual for detailed solutions.
7.1 No Power or Motor Issues
If the turntable has no power or the motor isn’t functioning, check the power cord connection and ensure the switch is turned on. Verify that the outlet is working and consult the manual for troubleshooting steps. Clean and lubricate moving parts if necessary to restore proper operation.
7.2 USB Connection Problems
If experiencing USB connection issues, ensure the cable is securely connected to both the turntable and computer. Restart your device, reinstall drivers from the provided software, and test with another USB port. Consult the manual for detailed troubleshooting steps to resolve connectivity problems and ensure proper digital transfer functionality.
7.3 Distortion or Poor Sound Quality
If experiencing distortion or poor sound quality, check the cartridge alignment and ensure the stylus is clean and undamaged. Verify tracking force is set correctly and adjust if necessary. Inspect the record for dirt or warping and clean it thoroughly. Ensure the turntable is properly grounded to avoid hum or interference.
7.4 Cartridge and Stylus Maintenance
Regularly inspect the cartridge and stylus for dust or debris. Gently clean the stylus with a soft-bristled brush or specialized cleaning solution. Avoid touching the stylus tip to prevent damage. Replace the stylus every 2,000 hours of use or when signs of wear appear. Proper maintenance ensures optimal sound quality and prolongs the cartridge’s lifespan.

Maintenance and Care
Regularly clean the turntable, platter, and tonearm to prevent dust buildup. Lubricate moving parts as needed and inspect for wear. Proper care ensures optimal performance.
8.1 Cleaning the Turntable and Accessories
Regularly clean the turntable, platter, and tonearm using a soft, dry cloth to remove dust. For stubborn dirt, dampen the cloth with distilled water, but avoid harsh chemicals. Clean the stylus gently with a specialized brush to maintain sound quality and prevent damage. Proper cleaning ensures optimal performance and longevity of your turntable.
8.2 Lubricating Moving Parts
Apply a few drops of silicone-based lubricant to the tonearm pivot and motor components periodically. Avoid over-lubrication to prevent attracting dust. Use a clean cloth to wipe off excess. Proper lubrication ensures smooth operation, reduces friction, and prevents wear. Refer to the manual for specific lubrication points and recommended products to maintain optimal performance and longevity.
8.3 Regular Checks for Wear and Tear
Inspect the stylus for wear or damage regularly. Check the tonearm for proper balance and alignment. Ensure the turntable mat and platter are clean and free from debris. Examine the belt (if applicable) for cracks or stretching. Address any issues promptly to maintain optimal performance and prevent further damage to the turntable components.

Understanding the User Manual
Welcome to the Audio-Technica AT-LP120-USB user manual. This guide provides detailed instructions for setting up, operating, and maintaining your turntable. Read carefully to ensure proper use and troubleshooting, maximizing your vinyl listening experience with optimal performance and longevity of the device.
9.1 Navigating the Manual’s Content
The manual is organized into clear sections, starting with an introduction, followed by setup, operation, and troubleshooting. Key components include a table of contents, detailed instructions for each feature, and a troubleshooting guide. Safety precautions and warranty information are also highlighted to ensure safe and effective use of the turntable.
9.2 Important Safety Precautions
Always handle the stylus with care to avoid damage. Ensure the turntable is placed on a stable surface and keep it away from liquids. Avoid exposing the device to extreme temperatures or humidity. Never connect the power cord until assembly is complete. Follow all instructions carefully to prevent damage and ensure safe operation.
9.3 Warranty and Support Information
Your Audio-Technica AT-LP120-USB turntable is backed by a limited one-year warranty covering defects in materials and workmanship. For detailed warranty terms, refer to the manual or contact Audio-Technica support. Visit their official website or reach out to your local distributor for any inquiries or assistance with your product.

Additional Features and Accessories
The AT-LP120-USB includes a high-quality AT95e cartridge, adjustable counterweight for optimal tracking, and a dust cover for protection. USB connectivity enables easy digital transfers.
10.1 Built-In Phono Preamp Functionality
The AT-LP120-USB features a built-in phono preamp, eliminating the need for external equipment. This functionality allows direct connection to amplifiers, receivers, or powered speakers, enhancing versatility for both home and professional settings. The preamp ensures high-quality audio reproduction, making it a convenient and robust feature for users seeking flexibility.
10.2 Using the USB Output for Recording
The USB output on the AT-LP120-USB enables easy recording of vinyl to digital formats. Connect the turntable to a computer via the included USB cable, compatible with both Mac and Windows. This feature allows users to digitize their vinyl collection effortlessly, ensuring high-quality audio transfer and preservation of their music library.
10.3 Compatibility with External Speakers
The AT-LP120-USB turntable is designed to integrate seamlessly with external speakers via its RCA outputs. These outputs ensure high-quality audio transmission, allowing connection to amplifiers, powered speakers, or receivers. The turntable’s compatibility with various audio systems makes it versatile for both home and professional setups, ensuring optimal performance across different configurations.
The Audio-Technica AT-LP120-USB turntable offers professional-grade performance with a direct-drive motor and USB connectivity. Ideal for vinyl enthusiasts and DJs, it combines versatility with exceptional sound quality, making it a top choice for both home and studio use.
11.1 Summary of Key Features
The AT-LP120-USB features a direct-drive motor, USB output, and built-in phono preamp. It supports RCA outputs, adjustable counterweight, and compatibility with Windows and Mac. Designed for both home and professional use, it simplifies vinyl-to-digital transfers and offers high-quality audio reproduction, making it a versatile and reliable turntable for various applications.
11.2 Final Tips for Optimal Performance
For optimal performance, clean the turntable and stylus regularly, ensure proper tonearm balance, and use high-quality records. Keep the surface stable and avoid direct sunlight. Refer to the manual for maintenance tips and troubleshooting. Proper care enhances sound quality and extends the lifespan of your AT-LP120-USB turntable.